
Event Tracking with Google Tag Manager

Hi there! I am Brandon Green and I’m a member of a digital marketing agency in Birmingham, AL called Telegraph Creative. I’m here to help you increase your tracking skills. I’m going to speak on four topics ranging from pretty beginner to advanced so I make sure to help everyone take at least one thing away from this!
Onclick Handlers Cause Problems:
You should be using Google Tag Manager (GTM) and not onclick event handlers. When you use GTM you are hiding your tags and triggers in the container and not wide open in the code on your site. These onclick handlers are accessible through the inspect element feature in Chrome and other browsers as well! They are super easy to change locally and when you do so they still send the data back into the Google Analytics account that it is associated with it. If you’d like to keep your data clean, please don’t do this! The following is how easy it is to change this. I am trying to terrify you right now so that you will quickly replace all of these onclick handlers.
Below is the onclick handler in the code. Yes, I removed the Facebook link because you likely know the website. This is the original code.

This is what is being passed back into their GA account per Google Tag Assistant.

Below is the same onclick handler that I changed locally within inspect element. This is as easy and double clicking and typing in the new event action.

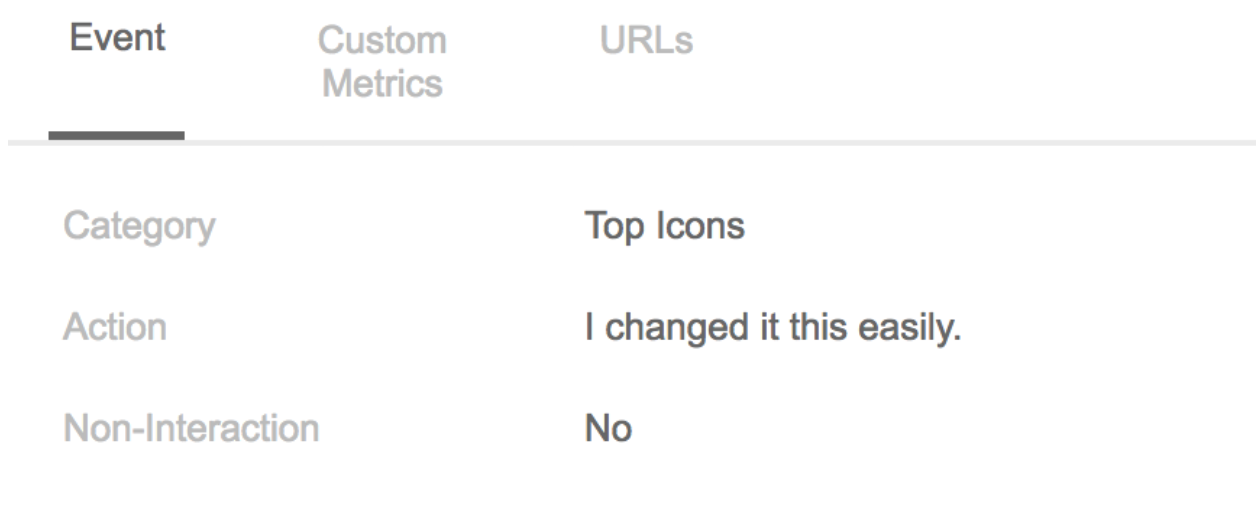
This is what happens. The same event tag within Google Tag Assistant comes back with what I typed in locally. This was sent to their GA account and now someone is wondering why it is there!
You have events and now you need goals:
Setting up event tracking is something I will assume you’ve already done. If you are unsure about doing this then you can learn about event tracking with Google Tag Manager. Let’s just say you’ve got tracking set up on a button on your site through GTM and you have a conversion URL you’d like to set up as a goal as well. Naturally, as most digital marketers do, the conversion url is simply a /thank-you page.
Setting up goals is something most people think is difficult when it is pretty easy. Setting up goals in GA is actually really easy. Open up your account and click admin. Once you are there navigate to the right account, property, and view. Please keep in mind that goals are associated to the view-level of the account. If you have a reporting and unfiltered view, you’ll need to set up the goals in both the reporting and unfiltered view to testing purposes.
There are three steps to setting up a goal:
1) The actual goal set up itself. There are many templated goals that GA have for you to choose from and you can learn about templated goals here. This is the first step in the goal setup process and a quick screenshot of the selections.
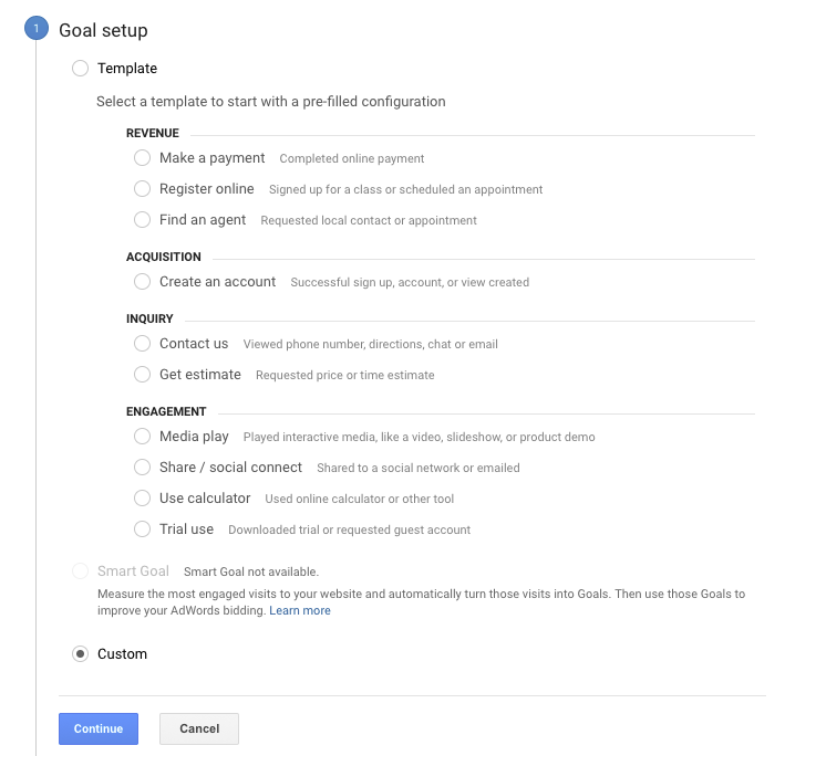
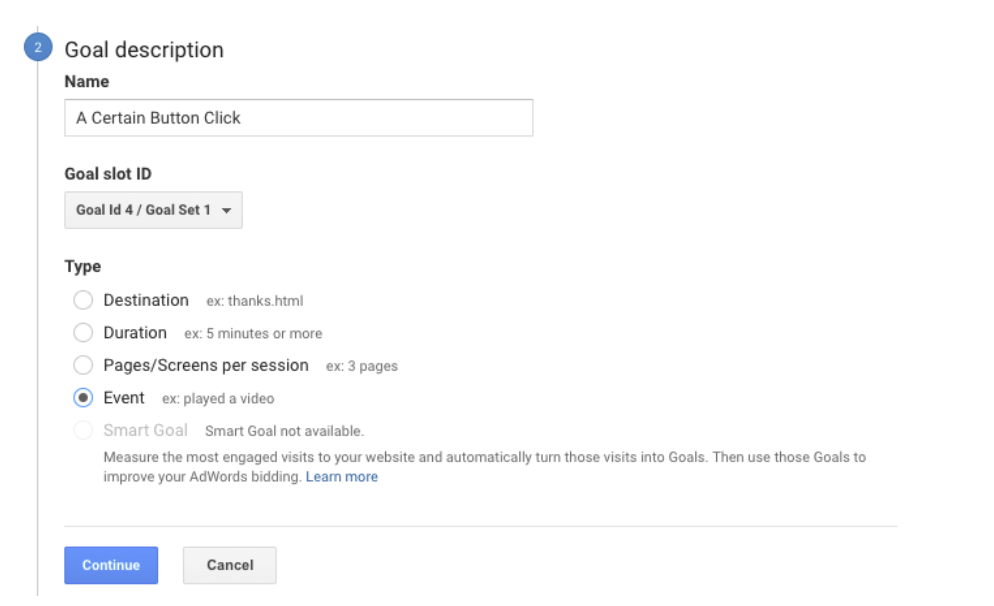
2) The next step is to fill in the Goal Description. This is the setup process for defining whether the goal is a destination url, a certain duration, a number of screens, or an event. When it comes to an event, this can really be anything on planet Earth. This can be a button click, a certain percentage of a video play, a form submission, etc. Another important step is to correctly name the goal so it can be both identifiable to you, your company or your client. This is an important step if you use any sort of report automation.
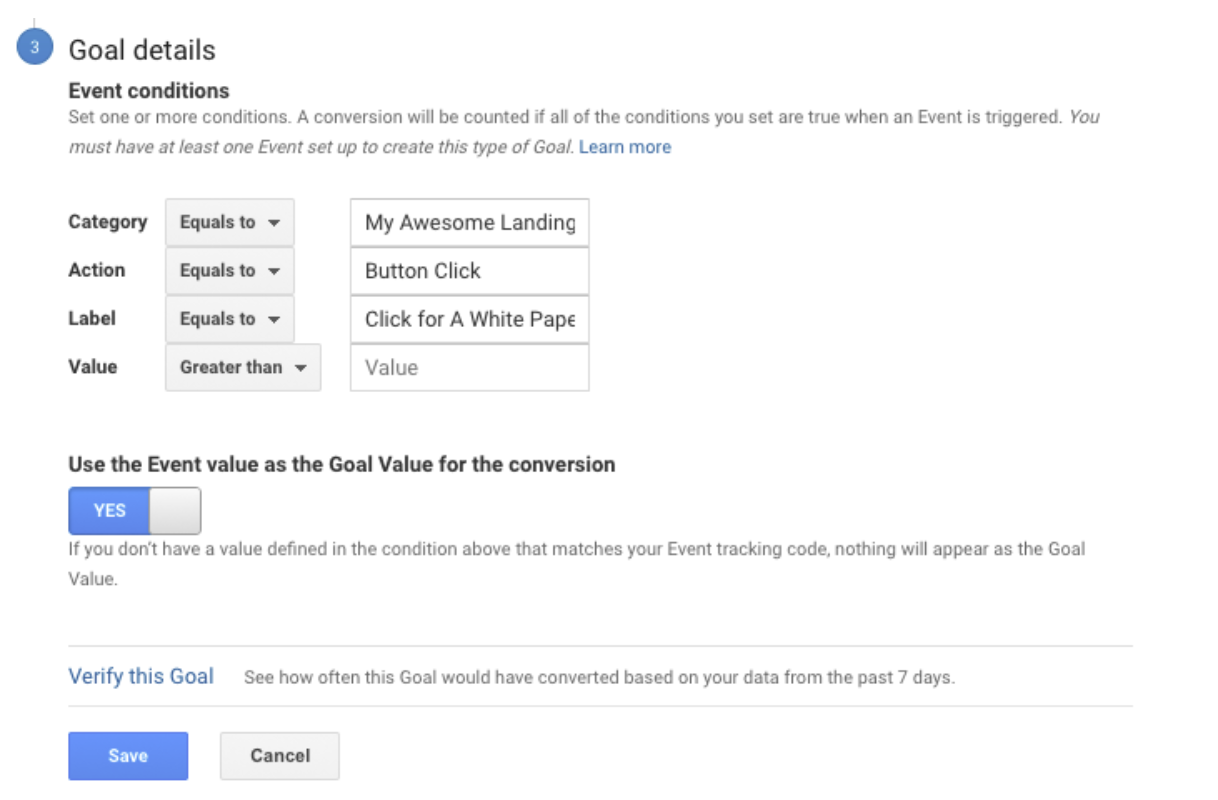
3) The final step is to create the event conditions for the event-based goal. This is simply identifying the event based of the category, action, and label you have previously set up. Please note that this is case sensitive! Let’s say that we have this certain button click set up as an event already and it is as follows:
a. Category – My Awesome Landing Page
b. Action – Button Click
c. Label – Click for A White Paper
Once you’ve put in the category, action, and label, you are good to click save.
Now that you’ve done that, you will see it has been added into your goals list!

Even better, is now you can return to the GA interface and soon you’ll be able to see goal completions by channel, geography, demographic, age, any any sort of UTM tracking you’ve set up!

Dynamic event tracking:
We all know event tracking is awesome for gathering data, but what do you do when you are asked to gather events on a large scale? I’m talking a lot of events here. One example of this is in the navigation of a website.
This is where the click text variable comes into play. This is simply a built-in variable within the GTM interface that allows you to grab the text of whatever is clicked. It is pretty awesome! Alright so how do we start to do this dynamically? Normally you’d need to use CSS selectors to drill down into the content and single something out and label it an event. In this case, you are singling out a section of a site and dynamically extracting what was clicked. First, venture over to a technology conference in Birmingham, AL called Sloss Tech. You can follow along.
The first step is creating one tag to track this whole section. This is easily done by using a category to describe the highest level identifier of the event, then the action to identify what was taking place, and then the label is the most specific form of identification.

Like mentioned before, we need to extract every click in the navigation of the site, but do it quickly and dynamically. The next step is to find the the broadest selectors that hold the content you are looking to track. If you will, right click on “2017 RECAP” and click inspect element. You’ll see this screen come up.
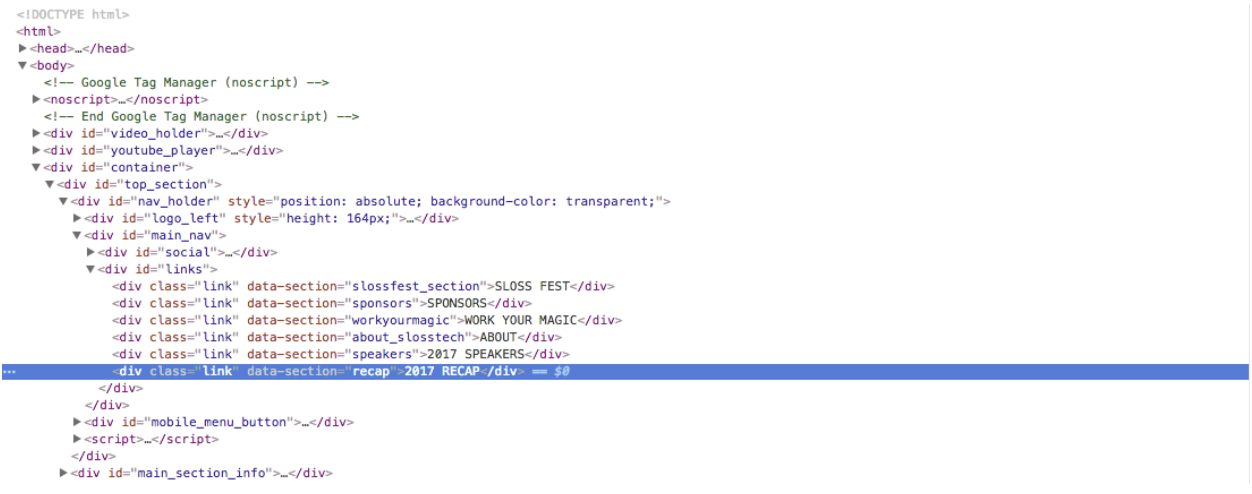
You can then move your mouse over the different div containers to find the highest level div that contains the content you want to track. You’ll see that div#main_nav contains the content, but it also contains the three social media icons that don’t have text. Then you’ll see that div#links contains what you are looking to track! So now we need to single out this section with CSS selector to track just this area and nothing else. The screenshot below shows you how you can single this content out broad enough to contain only the navigation elements that contain text.

Here we are saying I want to fire this tag that dynamically trackings the clicked text, but only do so when the clicked element’s CSS selector matches something in a div container with the id of main_nav and also has a div container within it with an id of links. I know that is a lot, but it really isn’t too difficult! There you have it, you’ve just tracked all of those items with one tag and one trigger. Here is the proof!
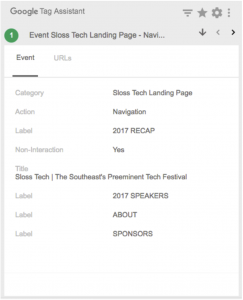
Finally, tracking forms after form validation:
Forms are often tracked by sending a user to a page upon completion. This is normally a /thank-you page. It seems this method is slowly being changed to a dynamic thank you message. This is often the case with Gravity Forms, Squarespace forms, and forms built from scratch. You don’t need to worry, you can track these really easily with the help of a developer. You can even do it yourself in Gravity Forms and Squarespace by posting a small JavaScript snippet that pushes a custom event to the dataLayer once the form is submitted. Both of these content management systems have post submission areas for you to insert customized scripts.
The script that needs to be inserted after the form has been submitted is <script> dataLayer.push({‘event’: ‘event_name’}); </script>. This very simply pushes a custom event to the dataLayer that you can reference as a trigger within GTM. You can make your way to the Sloss Tech website again and if you want to sign up for the email newsletter (I promise it is awesome), then you’ll see this custom event working!
How do you see that is working? Easy! You can open up the JavaScript console by right clicking on the screen and doing inspect element and moving to the Console tab. Make sure you haven’t refreshed the page after you submitted the form. Once you are there, you can type “dataLayer”, and the dataLayer object will show up with everything that has been pushed to GTM’s dataLayer. If the last event you did was the form submission, then you’ll see it there!

The hard part is over! The next steps are creating a tag to fire whenever a custom event happens with the name you’ve identified. In this case, the script that fired after that submission was <script> dataLayer.push({‘event’: ‘newsletter_signup’}); </script>. Now all that is left is creating a trigger based off a custom event.
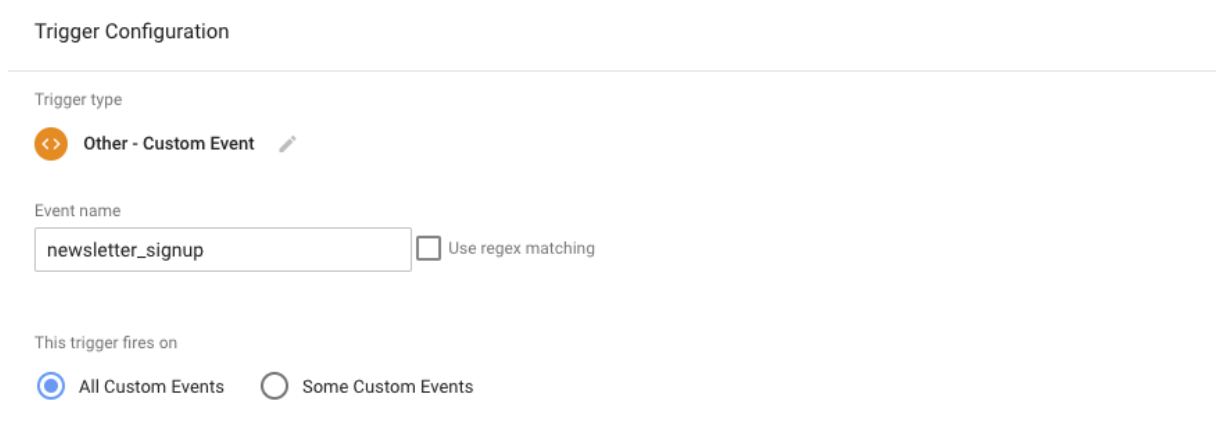
It really is that simple. Now all you have to do is set the tag to fire whenever this trigger happens!
Okay, I know this was a long read but I hope you’ve learned a couple new things that will help you out in the future.